Howto : Use USB Drive as a Hardware key for computer

Windows has an inbuilt system utility called SysKey that can help you use a normal pen drive as an access device instead of a regular text based password. To do this

  • First step is to assign A: as your removable disk drive. This is because the utility was designed to work with floppy drives.

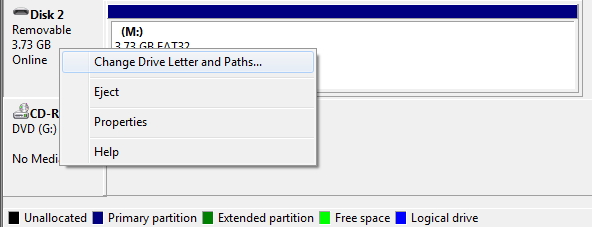
change-drive-letter

  • To do this hit [Window] key and type “disk management” and press enter. Right click the relevant drive name of USB and change drive letter.
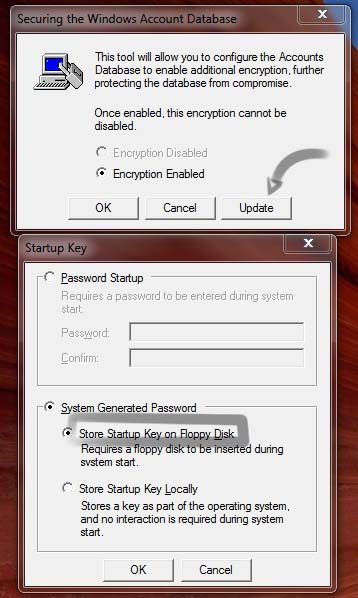
  • Now hit the [Window] key again and type Syskey and press Enter.

syskey-store-usb

  • Click update –> Store key on Floppy Disk. Click OK

After this a file called Startkey.key will be created on your pendrive and your PC won’t boot into your desktop unless the pen-drive is plugged into your system.

To revert back , just follow above procedure again and set STORE STARTUP KEY LOCALLY.

How to: Backup up your Facebook and Twitter account

Don’t Lose Your Tweets and Miss your Posts. Make Them Permanent

Facebook

Facebook allows you to backup all your data without using any third-party apps.

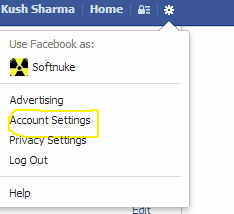
To do this, click on the drop-down menu next to your name in the top-right corner.

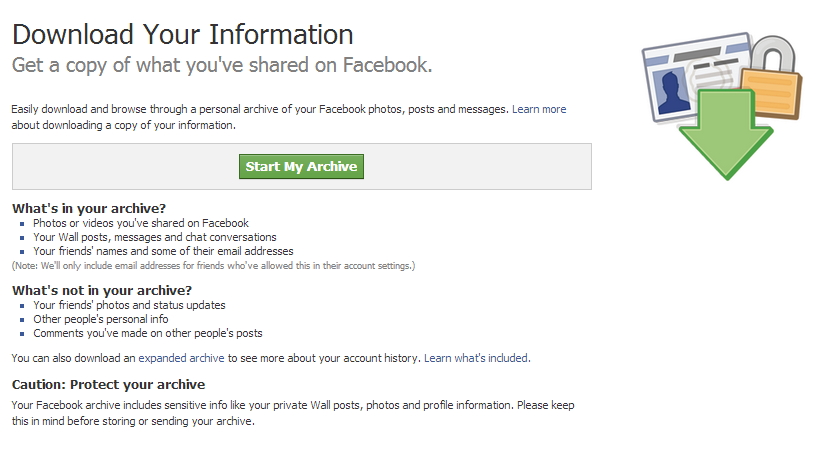
fb-twitter-backupGo to account settings and you will find a link which says “Download a copy of your Facebook data”. Once you click on it, Facebook will tell you what the backup will contain. It includes your photos, wall, posts, messages, chats etc.

Click on “Start My Archive” to begin the process. You will receive an email when your archive is ready for Download. The archive contains an HTML version of your account which you can store locally. Ensure that you save this data carefully.

fb-twitter-backup

Twitter

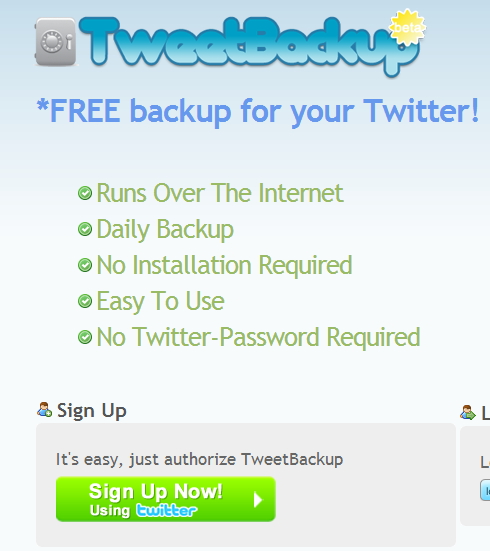
Twitter is sneaky little blue bird. While you’re happily tweeting away your pearls of wisdom on the micro-blogging site Twitter is busy deleting your old tweets. Yes, only 3,200 of your most recent tweets are available online. Imagine all those dear diary style ramblings, those witty innuendos, those wisecracks all gone! The horror! Fear not, there are several services such as Backupmytweets.com and Tweetbackup.com which will help you preserve all that you hold dear on Twitter. TweetBackup requires you to sign up using Twitter and an email address.

twitter-backup

Oauth will authorize the app and you will be on your way. Go to the export tab on the web UI and you can export your tweets as plain text or HTML.

BackUpMyTweets also works in a similar way except that you need to post an obligatory tweet about the service.

Steganography – Hide your data in images

If there’s one thing that history and popular culture has taught us about spies and secrets, it’s that often, the best hiding spot is the one in plain sight. After all, if an intruder is searching for valuable information, surely the last place he would check is right under his own nose, right?

A Little Get to Know

Steganography

This logic forms the basis for steganography, itself an ancient historical practice of concealing information within images. This practice differs greatly in purpose from cryptography. The latter employs code to hide a message, this appears as jumbled letters and numbers, unless a cipher(or key) was used to decrypt the information back into its readable state. However, while cryptography is a great for sending messages securely across unsafe channels, the very nature of the encrypted message will tip-off anyone is its true form. In short, just because its hard to break into, doesn’t mean you want to leave it in plain sight. What if sending encrypting messages itself is against the law?

This is where steganography comes in. Using basic freeware tools like OpenPuff, It is possible to hide audio files, videos, messages and images within a file (usually an image).

Now comes the Action : Hide

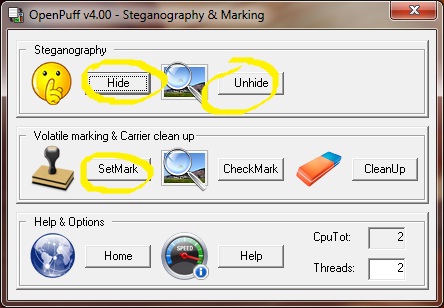
You can download OpenPuff from here. After downloading and installing OpenPuff you’ll see two primary options for steganography: Hide and Unhide.

openpuff-title

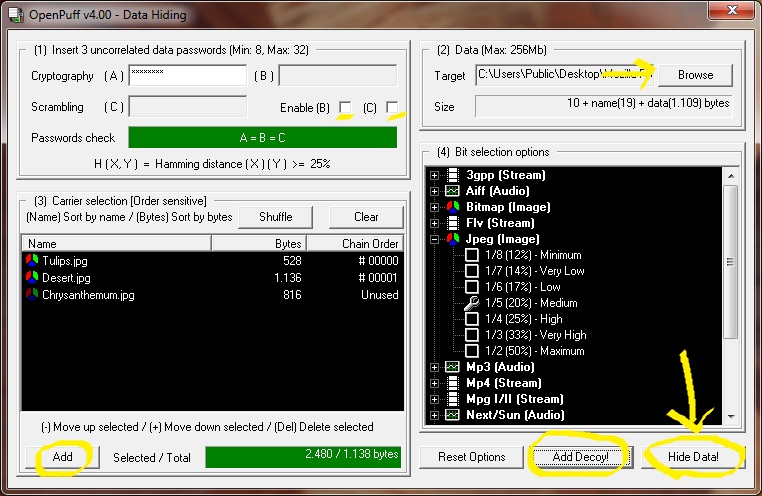
Select Hide, and you will be taken to a menu divided into four steps.

  • The first step entails entering up to three different passwords to secure your data. You can choose to enter only one password as well, if keeping up with them all becomes tough.
  • Then you will have to select your target file that you’ll be transferring.Use the Browse button, and select the target to see its overall size in a bar below the name.
  • In this third step, you will have to choose a carrier. Keep in mind that the carrier can’t be smaller that the target (it may become suspicious).

openpuff-hide

You can attach multiple carrier bits if one file isn’t big enough. Hit the Add Button to navigate to files designated as the carrier space is greater, the red status bar will turn green.

The Bit Selection Option allows you to properly encode the carrier’s size until it matches with the target. Keep in mind that some formats would be better suited than others. OpenPuff will alert you if the file type isn’t supported for being a carrier.

After Bit Selection, hit “Hide Data” and a new file will be created. On the outside, the carrier will look like a normal image file.

Unhide

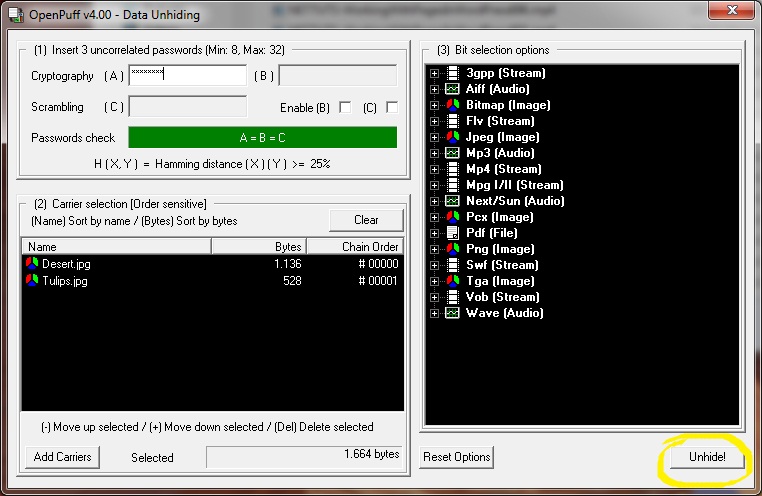
Navigate to the Unhide option in the main menu and proceed to enter all the relevant details used for encrypting the file. Ensure that the passwords and bit Selection option are exactly the same as those used before, or else the file won’t open. Select your carrier file then, hit “Unhide” and Bam!! The target is now revealed.

openpuff-unhide

Decoy

You can also choose to fool any attackers by using the “Add Decoy” option. Simply head over the Hide menu, and after the previous four steps, select “Add Decoy”. You can add a file, just like when adding the target, and set multiple passwords for it. When you’re done, hit “Hide Data”.

Watermarks

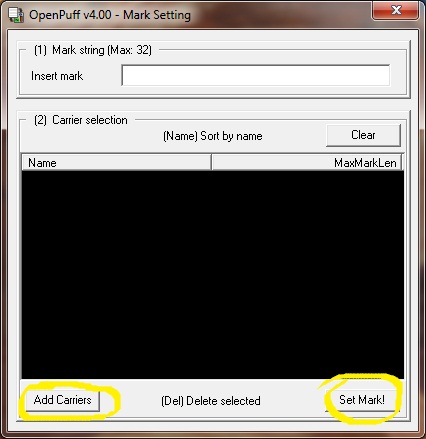
Selecting the SetMark option, and adding a mark to a specified carrier can add watermarks. Similarly, CheckMark allows you to verify the watermark by selecting the carrier in question. You can also use CleanUp to remove a watermark from an image.

openpuff-setmark

In the End

Steganography has its disadvantages and controversies but when used effectively, it becomes an invaluable tool for covert transmissions. Not to mention those times when you just want to claim right to your work.

Cool Bluetooth Gadgets Worth the Money

Who doesn’t like surrounding themselves with Bluetooth accessories for their electronic gadgets? We celebrate this fact of human nature

How Convenient would life be if everything turned wireless? In the present world that sees technological advancements every minute, it wouldn’t be wrong to believe that everything can be present at our fingertips. Let us discuss some of the cool Bluetooth-capable gadgets, that are now your wireless puppets.

Polaroid PoGo Instant Mobile Printer

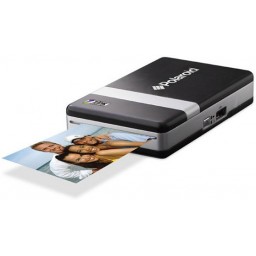
polaroid-czaWe’ll start with my favourite. The Polaroid’s PoGo printer(Rs.3835) prints 2×3 inch-colored photos under a minute directly from your phone or digital camera. It runs on ZINK( Zero Ink) Technology. The photo paper has microscopic crystals that are activated by heat in the printer to produce color. The device has a range of over 35 feet, and the rechargeable battery runs for about 15 prints. The photos are smudge proof with a glossy finish. They are also water and tear-resistant.

InsecDroids

insecdroidsThis one is for the smart kids. A company named D-RED came up with a new OS app called InsectDroids, for children of ages 5+. It is designed to control small plastic bugs of the same name. You can make these insects scamper about on the floor using your iPhone or iPad. It comes with a rechargeable battery. This toy will cost you close to Rs.2500

Medisana TargetScale

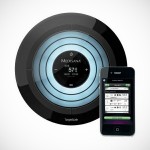
Medisana TargetScaleThe Medisana TargetScale is a Bluetooth-capable weighing scale that shows you accurately your body mass index(BMI), body fat and water, plus muscle and bone mass aside from your weight. The “smart scale” has flashing rings which gives it a futuristic look, more like the Star Trek transporter. It works in conjunction with a VitaDock app, and sends data to your iPhone or iPad so that users can analyze their progress on the go. It will cost you USD 130, and it isn’t available in India.

Qi-wear Streo Bluetooth Sunglasses

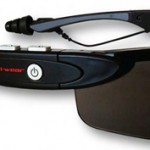
iharmonix-stereo-bluetooth-eyewearIt has Streo Bluetooth connectivity and eye protection in one package. The Q-i-wear stereo Bluetooth Eyewear by iharmonix is designed with dual microphones to cancel ambient noise for clear communication and noise-isolating ear-tips to reduce noise levels by up to 42 decibel. It has on-frame controls and can deliver up to 4 hours of talk time, 8 hours of music playback and up to 7 days on standby when fully and replaceable lenses in clear, gray and amber. It’ll cost you USD 300.

Cobra Tag

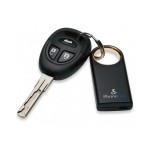
cobra-tagHow often do you forget your car keys, on your smartphone when you leave the room? Cobra Tag is designed to hang on your keychain, and use the Bluetooth technology so you never lose your phone or your keys. It creates a two way separate alarm between your android or BlackBerry smartphones and the tag. If you walk away with your phone, and the connection is broken, both your phone and the tag start emitting a high-pitched noise reminding you to come back for the keys. If that’s not enough, the Cobra Tag app can send you a text message, email or tweet to inform you that you’ve lost your belongings and for the unmindful people like us, it sends a map to locate the whereabouts of your device. Take note that this device will cost you close to Rs.3200.

Beam Bluetooth Toothbrush

beam-toothbrushNow flash your tooth, with Bluetooth. It is true that for most of you, brushing your teeth would not be on top of your priority list. Beam Technologies came up with this high tech toothbrush with sensor, that monitors your oral hygiene habits and sends analysis to your smartphone via Bluetooth. To lure people into brushing for 2 minutes, it also allows you to play music while brushing. Parents can keep a track of their child’s brushing habits by pairing all Beam Brushes to same smartphone. Later versions will track how much time you spent in scrubbing certain areas of your mouth and help improve your oral hygiene. So, there’s no way out for the sloth in you. What’s next, Bluetooth floss? It costs USD50.

Lego Mindstorm NXT Robot Kit

lego-nxtThis Shows the real potential of the Bluetooth technology. The Lego Mindstorm NXT 2.0 for you geeks features 32-bit microprocessor, a large matrix display, 4 input and 3 output ports, and Bluetooth and USB communication link. It has ultrasonic, touch and color sensors and 3 motors to make your robot alive. Basically, it is a bunch of electronic parts, motors, gears and cams that can be put together to create different robots that respond to programs you create and transmit via Bluetooth. Once it’s together, you can wirelessly tell your robot to move, spin, make noise and even pick up a ball with its claw. It can be easily programmed using software on your Mac or Windows with an intuitive drag-n-drop interface. The programs are transmitted to the robot from up to 25 feet away. Show off your creation, or take it apart and start over. There’s no limit to what you can build with this kit. Go ahead and buy it just for Rs.19000.

Logitech diNovo Mini Keyboard

logitech-dinovo-mini-keyboardIt’s compact, it is wireless and it takes full control of your home entertainment PC setup. The keys are twice the size of BlackBerry, but it encourages thumb-typing. The control pad lets you change from touch-pad-style control to directional up-down-left-right controls by sliding a small switch. The keyboard has 45-feet range and its battery should run for two weeks of on-and-off use. The diNovo Mini is also compatible with the PlayStation 3, but lacks Apple and xBox360 support. A well-integrated mouse-pad, backlit keys, multiple connectivity options and media buttons make the diNovo a valuable asset. Buy it for just Rs.5000.

OnStar FMV

onstar-fmvOnce found only in General Motors vehicles, the OnStar FMV-“For My Vehicle” is now available as an add-on rear view mirror for a wide variety of other cars. Who knew safety could come in this little a package? The GPS enabled device offers accurate turn-by-turn voice directions, hands-free phone calls and all sort of vehicle assistance. Sync your phone via Bluetooth and make calls without taking your eyes off the road. OnStar FMV provides Automatic Crash Response, 24×7 emergency services, stolen vehicle location assistance and roadside assistance. It will be your favorite assistant on road. This behind-the-wheel peace of mind costs you USD 300 plus installation charges, about USD 200-300 a year for the OnStar services. Unfortunately, we don’t have this service in India as of now.

Evernote

Evernote is an easy-to-use, free app that helps you remember everything across all of the devices you use. Stay organized, save your ideas and improve productivity. Evernote lets you take notes, capture photos, create to-do lists, record voice reminders–and makes these notes completely searchable, whether you are at home, at work, or on the go.

Why Use Evernote?
Without the Evernote app, I’d be a lot less productive while I’m away from my desk, when the only device I typically carry is an iPhone 5. This free, straightforward note-making and –syncing app outrivals most competing apps thanks to its strong search capabilities, effortless tagging features, and  simple organization. But the real key to its success and popularity is that Evernote synchronizes all your files by saving them to a cloud service, meaning anything you create or alter from your iPhone will be there waiting for you when you log into any other version of Evernote, such as Evernote for iPad,Evernote Web app, Evernote for Windows, and every other platform where it’s supported.

Evernote excels when it comes to searching your notes. Evernote can find typed text, as well as text that shows up in images, including handwriting. Let’s say you’re walking or driving by a new shop, and you want to jot down its name, address, and phone number. You can pop open Evernote and simply take a photo of the store’s window or awning where that information is likely to appear. Later, just search for anything you can remember about the business, either the first few digits of the phone number or the name of the business, and Evernote will find the photo. Although I’ve been able to stump Evernote’s OCR, it’s reliable on the whole.

In a nutshell, Evernote lets you create all kinds of electronic files—text files, images and photos, audio or voice memos, and videos—and gives you access to them through a variety of interface Log into any of these access points with your Evernote account, and you’ll be able to read, write, search, and otherwise utilize all your files.


With the new interface, you now have easy ways to view your information no matter how you have it organized. Whether you rely on using notebooks, places, or tags to find your notes, you switch to a view tailored to your preference that shows you a handy list of each. This is a much better experience than the older versions of the app provided, putting all the ways to browse Evernote only a couple of taps away.

My only beef with this app is that the premium version offers all the important tools you need, but costs more than most people will want to pay. With Premium, you get PIN access to keep your professional documents safe; you can use and edit documents offline when there’s no connection; you can view past versions of your notes with note history; and much more. I understand that a company needs to make money and Evernote is a great service, but I think $5 per month puts it out of reach of many users (like students who could really take advantage of the app), and after only a few months your investment in the service will be more than it’s worth.

The good: Evernote gives you access to your notes, images, and voice recordings on all your devices. A premium subscription includes PIN access, among other features.

The bad: Evernote Premium offers the ideal setup with PIN access, document history, offline notebooks, and priority support, but a $5 monthly subscription is simply too steep.

The bottom line: If you’re looking for a note-taking app that syncs across all platforms — or just an easy way to keep track of your digital odds and ends — Evernote is a worthwhile download.

How to Spy on Your “Buddy’s” Network through Wireshark

Wouldn’t it be nice to just sit at your buddy’s house, plug into his network, and see exactly what he’s doing? What if it was as easy as that? What makes packet sniffers like Wireshark such potent tools is that a majority of local area networks (LANs) are based on the shared Ethernet notion.

In a shared Ethernet, you can think of all of the computers in a LAN as being plugged into the same wire, and all of the traffic that travels through it can be captured. Packet sniffers are more formally known as network analyzers and protocol analyzers. But what traffic are we talking about?

Everything. Granted encrypted data will be unreadable to you, you can still see it, and anything that is sent plain text (not encrypted) can be grabbed very easily. This includes passwords, logins, instant messaging conversations, emails, etc. Everything.

For example, assume that your network card picks up a packet fromsomeone else’s network. Normally, once the packet is handed off, the operating system must determine exactly what type of packet it is. To do so, it strips off the Ethernet header of the packet and looks at the next layer. Perhaps it’s an IP packet.. Well, the OS must now strip of the IP header and determine which type of IP packet it is. Finally, let’s say it’s determined that the packet is a UDP packet. The UDP header is stripped off and the packet payload (the data) is handed over to the application that the packet was sent to.

Now, this is an oversimplified version of what really goes on, but I’m trying to illustrate a point. Packet capture allows us to intercept any packet that is seen by the network device, and grab it in its entirety, headers and all. Regardless of which port is being sent to, or even which host, for that matter.

Let’s Steal Some Data!

If you’re running BackTrack, you already have this set up in your /pentest directory. Otherwise, let’s go ahead and grab the packages. If you want the latest version of 1.6.5, you must download and compile the source code. If you don’t mind the older 1.6.2 version, you can use the repositories. In this case, I recommend the repos if you feel shy about compiling from source and handling dependencies. If you want the bleeding edge, grab the source. As of this writing, it’s a small difference.

Free BSD users can type:
$ sudo pkg_add -r wireshark

Debian-based systems can type:
$ sudo apt-get install wireshark

Arch users can type:
$ sudo pacman -S wireshark-gtk

If you do wish to compile from source, follow along below:

Step 1 Get All The Required Packages

Make a new temporary directory, because we’re going to download some files. Wireshark also requires libpcapglib, and GTK+ as dependencies. Backtrack users should again be good to go, but others might need to get these packages first.

Download the source code with Wget and compile it up.

$ wget http://www.tcpdump.org/release/libpcap-1.2.1.tar.gz 
$ wget http://ftp.gnome.org/pub/gnome/sources/glib/2.30/glib-2.30.2.tar.bz2
$ wget http://ftp.gnome.org/pub/gnome/sources/gtk+/3.2/gtk+-3.2.2.tar.bz2

Windows users can grab the 32-bit and 64-bit versions of Wireshark. Linux users can simply retrieve the source code by typing:

$ wget http://wiresharkdownloads.riverbed.com/wireshark/src/wireshark-1.6.5.tar.bz2

Step 2 Build and Install the Dependencies

Untar each package you downloaded, then move into the new expanded directory and type the following for each:

$ ./configure
$ sudo make
$ sudo make install

Step 3 Build and Install Wireshark

Now we can get to installing our network protocol analyzer, Wireshark. If you have any issues or problems at this stage with dependencies, check out this helpful link.

To get started, let’s type:

$ tar xvjf wireshark-1.6.5.tar.bz2 && cd wireshark-1.6.5
$ ./configure
$ sudo make
$ sudo make install

Step 4 Configure, Capture and Conquer

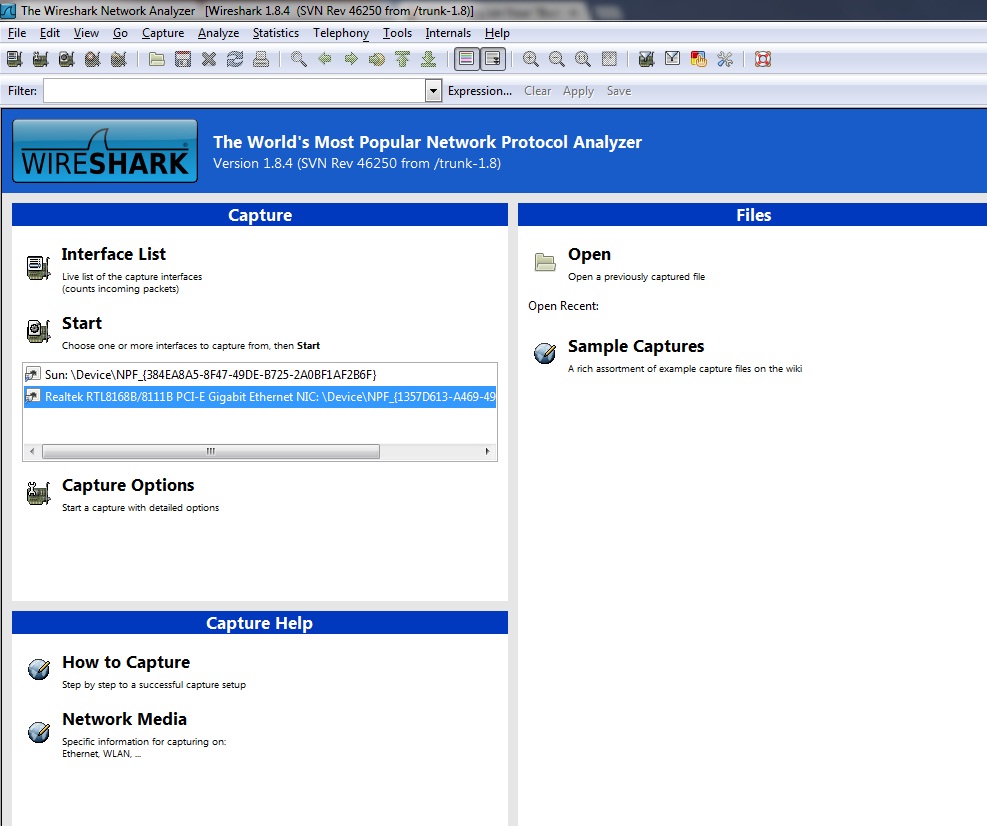
Now that we have everything up and running, let’s go ahead and fire up Wireshark. We should be greeted with the following screen:
titlescreen-wireshark


You’ll see a section titled Capture Help—I highly encourage first time users to give it a whirl. Also notice that if you had captured packets on another computer, you could import that file into Wireshark for analysis, as well.

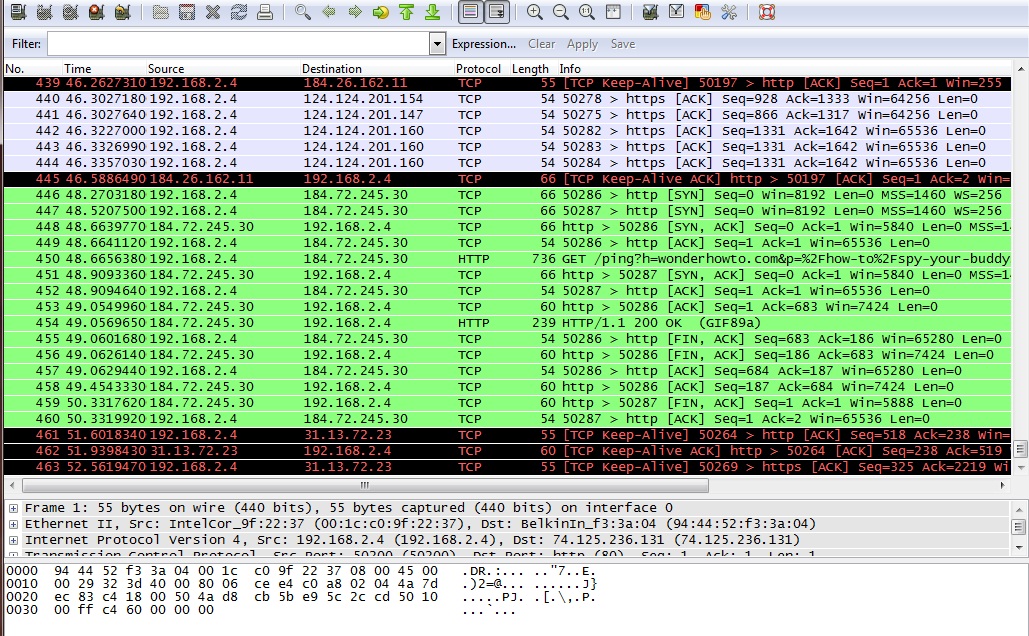
Under Capture, it lists all the interfaces on your system Wireshark can use to listen in on. /dev/eth1 is my wireless interface, so let’s click on that.
capture-wireshark

Here, we listened in on the interface only for a few seconds and picked up 24 packets. The first column lists the packet number, ordered in how they were received. The next column lists the time in seconds, which began when Wireshark started that session.

Source and Destination

The Source and Destination columns list the addresses contained in the header. You will notice packets that are addressed for you will show your internal IP address. This is because right now we are listening to the wireless traffic inside a network and as such, are behind the router. Packets coming to the receiving computer have already been stripped of the network IP address by the router. Remember how each layer of the OSI model can only talk to the layers above and below? That’s because as the data travels up and down the layers, the control info is added to it, and stripped off as it passes.

Next to that lists the Protocol of the packets received. Notice in the image where it says TLSv1 and Encrypted Alert in the info status? TLS stands for Transport Layer Security and if you remember from above, it runs on the transport layer.

Packet Overview

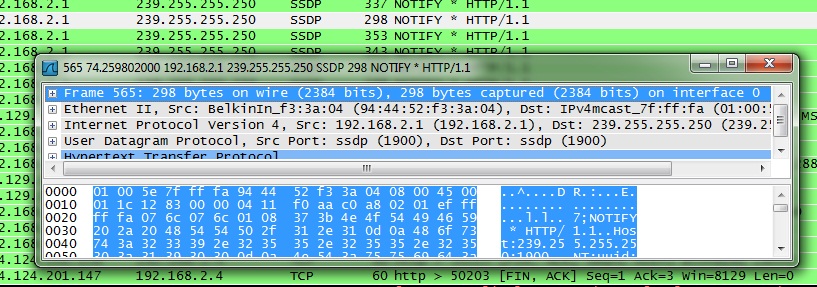
Under that lies an overview of the packet, giving you details such as size and what ports it was addressed to.
capture-window-wireshark

Click on one of the entries and move your keyboard arrows up and down. See how the highlighted block of jumbled letters and numbers moves along with it? All those jumbled letters and numbers are actually hexadecimal code, and next to it is a quick decoded overview of the data. If items are being transmitted encrypted, then this won’t be enough yet, but anything sent plain text will show up here.

In Action

Here, I opened my browser and typed www.google.com into the bar. Your computer sends a request to a DNS server to find out the IP associated with google.com. The server then returns the address back to you and your browser connects to it. We can see this in action by sniffing the traffic as it happens.

inaction-wireshark

Here you can see the protocol is DNS. The first packet is querying the server and the second packet is responding.

In Closing

Whew, that was a long read, but hopefully it was full of good knowledge. Sniffing traffic is useful for a multitude of reasons, from protecting your network from leaks by testing it out, to peeking at data that was not meant for your eyes. Next week, we’ll get into advanced capturing of wireless packets, and dig into Wireshark a little more deeper.
Make 3-D Glasses

3d_nasaReady to cry even harder as you viscerally experience the original FAIL Boat with Titantic 3D? You said you would never let go, after all. If so, make your glasses now so you won’t miss out.


What You’ll Need

  • Paper
  • Pencil
  • Sturdy cardboard, posterboard or cardstock
  • Scissors
  • Tape
  • Sheets of red and blue acetate (available at your local craft store)
  • Assorted decorations (optional)
  • For a quick alternative, simply print the pdf 3d glasses pattern below overhead projector transparency film on any color printer.

How To Proceed

1. First, design your glasses on paper in three parts. Include a frame front and two arms. Cut it out. This is your stencil. In Björk’s spirit, feel free to make them as creative or stylish as you like. But keep in mind: Intricate designs probably won’t transfer well when cut out of cardboard. Also, the glasses should probably fit your face. If you benefit from further illustrations check this how-to video out.There are some free templates on the web you can use, too. NASA provides a basic pattern as a downloadable PDF.

2. Check your stencil before continuing: Do your eyes and nose fit? Then trace your stencil on the cardboard.

3. Cut out the cardboard (don’t forget the eye holes!) and tape the arms to the frame front. Customize your glasses. Glitter glue is recommended.

4. Cut out a piece of red acetate and a piece of blue acetate, each a little larger than the eye hole. Tape a piece of acetate over each eye hole. While most versions of stereoscopic video have a very obvious orientation with the red on the right and the blue on the left, Björk’s website offers few clues. If in doubt, put the red film over the right eye. If it’s the wrong side, you can just flip the frame around. These glasses are versatile as well as attractive.

5. Test your glasses. View the image on the right through your glasses. It should appear in 3-D. There’s a pool dedicated to 3-D anaglyphs on Flickr with thousands of images, and even some 3-D videos. NASA’s Mars rovers also use two cameras to shoot landscape photos of the red planet. The results are stunning.

6. Enjoy the premiere! Now that you’re prepared, you are now able to enjoy many other illustrious examples of the 3-D film genre. IMAX doesn’t hold a candle to being able to elude Jaws right in your living room.

CD Jewel Case 3D Glasses Alternative with a couple of pens, a spare CD case and an inherent lack of shame, you’ll amaze yourself. And probably others, as well.
What You’ll Need

  • Red permanent marker
  • Blue permanent marker
  • CD Jewel Case

How To Proceed

1. Scribble blue and red marker pen on the CD jewel case about the width of your eyes.

2. Close yourself in a quiet room away from the ridicule, family and friends. Watch and enjoy.

Make an Encrypted Disk Volume With FreeOTFE

FreeOTFE is a free, open-source encryption program that allows you to use a single file, unformatted partition or unpartitioned disk space to securely store sensitive data on your computer. To access the data on an encrypted disk volume, you must mount it and provide a password. This makes the volume accessible as a new drive on your desktop. You can then store your sensitive files on this new encrypted virtual disk and unmount it when you’re done.

To get started, download the application from the FreeOTFE website and install it. FreeOTFE is available for all versions of MS Windows, and can also be used on Windows Mobile PDAs. Once you’ve installed the software, follow the steps outlined below.

Creating An Encrypted Volume

  1. Run FreeOTFE and click the “New” icon on the toolbar. The FreeOTFE Volume Creation Wizard will appear.
  2. The wizard is fairly self explanatory, and is simple enough to use. If you are unsure as to what options to select at any time, just leave them at their default values.
  3. When you’ve completed all of the wizard’s steps, click “Finish” to create your new volume. More advanced users may wish to click the “Advanced” option which will allow more technical options to be configured.

The volume will then be created, and automatically mounted, ready for use!

To dismount the volume created, just select it in the main window, and click the “Dismount” button on the toolbar.


Mounting and Using Your FreeOTFE Volume

  1. Run FreeOTFE and select the “Mount” button on the toolbar
  2. Select the FreeOTFE volume you previously created and click “OK”
  3. Enter your password and click “OK”

If you entere the right password, your volume will then be mounted, and will be available for use.

  1. When you want to open or save a file in your encrypted volume you can either click My Computer on the left side of the dialog box or chose My Computer in the drop-down list by “Open In:” (or “Save In:”) and then click on the drive letter you chose to mount your volume.
  2. You can move files into the encrypted volume by cutting and pasting it into the drive letter you chose, or just dragging them in
  3. You can also move files into the encrypted volume by simply dragging them to it using Windows Explorer
  4. To stop using a volume and secure it (or “dismount” it) to back to FreeOTFE, click on the drive letter you mounted the volume with and click the “Dismount” button.

Tips

  • FreeOTFE can be stored on a USB flash drive, and will allow you to carry your sensitive files around with you. If you do this, you may also want to take a look at FreeOTFE Explorer