Everyone has secrets, Those who don’t still want some things to stay hidden. Most of you would have already used software that are capable to lock your files and after that can only be accessible with a password (like WinRar). We are not discussing here how WinRar does that, but we will be discussing how you can create a simple application in C++ which will allow you to encrypt your text files in a way after which it will just look like a trashed content.
Encryption techniques are not new, they have begun thousands of years ago. It is generally termed as cryptography where we convert our original content to something which cannot be understood. Of course we can convert back the unreadable content to original but this can only be done if we knew how it was encrypted.
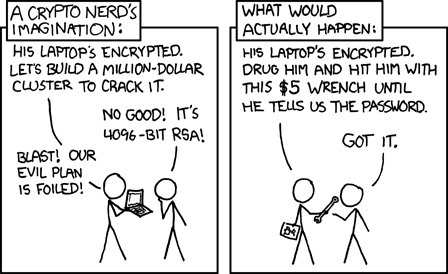
XKCD security comic.
To get an idea what it is let’s take a scenario:
I have a message that is highly important to get delivered to my friend. He lives across the street but I cannot go and meet him personally. So only way to communicate is by taking a white board and writing down my message, big enough that it can be seen from at least 50m. Then I will wave it from the terrace so that he can read it. Problem is when I show him the board, everyone else too has access to read the message. But to tackle this situation we have already planned a crypto technique which we can use while sharing secret messages.
Message I want to share: “Dude! I asked her out today.”
Message I am going to write on board: “04210405 09 01191190504 080518 152120 2015040125”
As you can see, this doesn’t make any sense if you don’t know the technique how it was ciphered. In this case, the methodology is extremely easy just to demonstrate. I have replaced each alphabet with its corresponding digit in sequence using two decimal digits (01,02,…,26). To get back the original text, I just need to follow the same process backwards by putting back alphabets in place of its number. Even this simple technique can be upgraded using “salt”. No! I am not talking about the one we eat, salt is a generic term used to add additional attributes in a predefined function. Here our function is defined by converting alphabet to number. On Wikipedia, “In cryptography, a salt is random data that is used as an additional input to a one-way function that hashes a password or passphrase”. Attribute could be anything depending upon the encryption algorithm. Say every time I convert alpha to numeric 50(salt) is added if it’s a vowel and space is replaced by 99.

A little improved message:
“04710455990999511911955049908551899657120992065045125”
While decrypting this, few points need to be kept in mind that is if the message contain any number above 26 then that should be subtracted from 50 because it’s a vowel and that 99 denotes space between words.
Let’s go back to our topic, in our application you need to have at least a basic idea of C++ language and a compiler to create a finished software once we finished coding. I will only be explaining important part briefly. Software requirements for our experiment are:
- C++ Compiler. I am using Orwell Dev-C++ by Bloodshed Software
- A text editor
Test your working environment by running this peace of code:
#include<iostream>

int main(){

cout<<”Good to go!”;

return 0;

}
Keep in mind C++ is a case-sensitive language (small a and capital A are treated different). Once your program compiled successfully and you see output in console we can move towards our encryption technique.
If you belong to computer science field, the term Bitwise Operations must be familiar to you but if not then please read it before going further. Easiest explanation could be, any operation that is done at individual bit level. Right now, XOR is the point of interest. To understand our algorithm, you are required to know how XOR works. The property that we are going to use of XOR here is:
Say we have a variable X whose value in binary format is “101” and a password key “111”, to cipher the value of X an operation of XOR is needs to be done on both of them. Formula for our algorithm can be described as “X XOR PASS = CIPHERED VALUE”. Here in our example it is
To get back the original value of X, XOR cipher value again with PASS “CIPHERED VALUE XOR PASS = X”. This property of XOR enable us to encrypt any binary data in a simplest way possible. Keep in mind, there are various ways to exploit this technique and any expert in deciphering can break this encryption when enough time is available. But you are not storing any thermal nuclear warhead blueprints or ways how a radioactive spider can make you Spiderman. As long as normal people (not so geeky) are considered, this technique is robust enough.
I am going to cut to the chase and go straight to the coding part. Open your compiler and create a new file. Start adding line of code describe below.
#include <iostream>

#include <fstream>

#include <string>

using namespace std;
These are the library required to successfully compile the program. All symbols in that namespace will become visible without adding the namespace prefix by using last line. Most of you professional coder might be angry for using this but right now, I am more focused on simplicity than flexibility.
void xor_encrypt(char *key, char *string, int n){

int i;int keyLength = strlen(key);
xor_encrypt() function is the core part where all the magic happens. This function accepts three parameters:
- Password key
- String of text required to encrypt
- Length of string
Operator for XOR in C is (^) which is used as a unary operator between string and password. First the length of password is calculated to use it along with Remainder Operator for array index. This will keep our password within the limits of its size length. For loop is required to run until string length is exhausted. One thing to notice is we are not returning anything from this function instead pointer is used to update the string by its reference.
int main(void) {

char key[] = "AllHailTheKingKush1212HAHA1212hehe";

char LOCKEDFILENAME[] = "locked.txt";
main() function is the nervous system of this program (every C++ program). In the beginning declaration of variables that we are going to use is done.
- Key variable holds the password that is required to lock and unlock our ciphered text.
- Lock Boolean variable is used as a switch between encrypting and decrypting.
- Union buffer will work as a temporary storage to hold data between the processing.
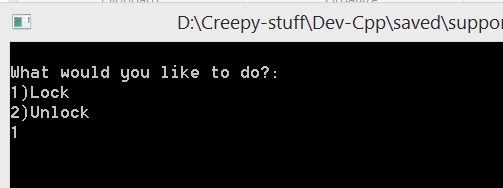
- Switch statement will enable user to make a choice between lock or unlock a file. Supported inputs are Numeric 1/2, 1 will encrypt a normal file and 2 will decrypt back to original.
if(lock){

ifstream unlocked;ofstream locked;
This part of code will read unlocked.txt file, cipher it and write it to locked.txt file.
- First, the lock condition is evaluated whether it is true or not, if yes then it is good to go.
- Two file streams are created to read and write file. This functionality is dependent on library we have imported above (fstream). One file will be used as an input and second as output, both of them are opened in binary format to keep the originality intact.
- Is_open() function will ensure that the file is accessed successfully then seek is used to jump to end to calculate the length of file (this task is not necessary but will provide an insight how big file we are dealing with).
- While loop perform three operation, firstly it reads the unlocked file step by step(depends on the buffer size) until it reaches to end, then it calls the core function of xor that will encrypt this piece of data and after that it is written back to locked file as ciphered text.
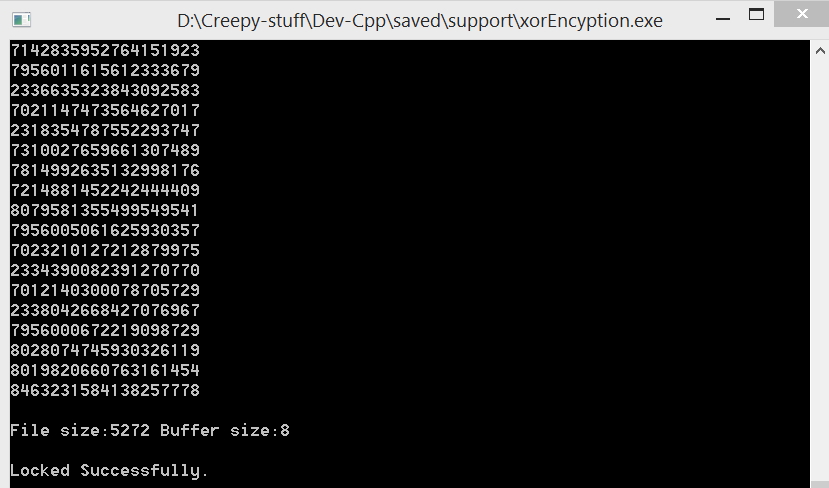
- In between there is a cout line that enables a visual log of binary data that is going for encryption in this process.
Once this loop ends, some information of file and buffer size is printed on screen and file streams are closed to free up resources.
if(!lock){

ofstream unlocked;ifstream locked;
These lines are mostly same as above lock code, the difference is we reverse the process and check if lock switch is false. If yes, then locked file will be taken as input and unlocked file will be created with deciphered text. Don’t forget the last “}” bracket, this is continued from the beginning of main function. Every “{” bracket is required to be closed with “}” in the end.
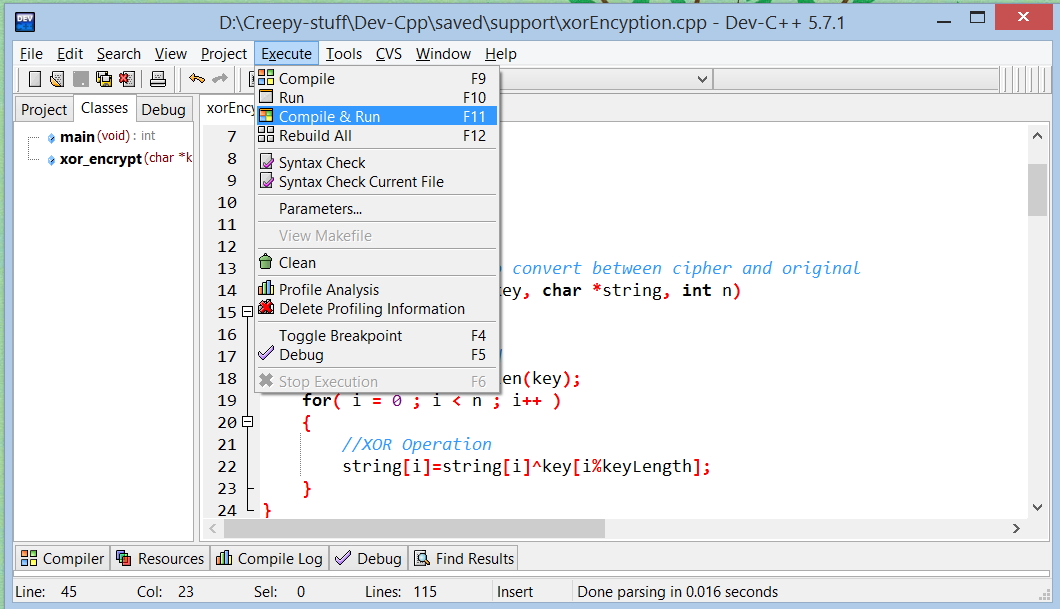
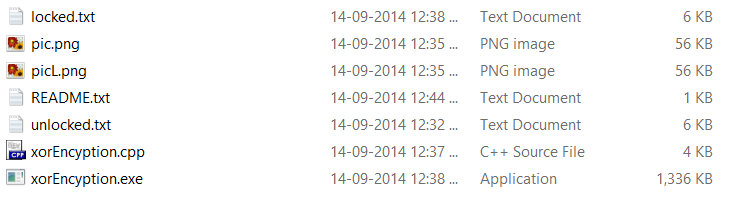
That’s it! Coding stage is completed, compile the program and run it. Before running, go to the directory where you have saved this program and create a dummy text file. File should be named as “unlocked.txt” otherwise our ultimate machine of encryption won’t work. Write some text into this file for testing purpose, save it. Compile & Run the program, Press 1 and hit enter.
If you see some binary numbers floating down the screen and a line stating “Locked Successfully” this means you have created your first very own encryption software in 15-30 minutes. But in case, compilation error or anything not so cool pop up then try to debug the code. Don’t forget even the simple “;” semicolon can stop the whole program from executing, try searching for case-sensitive errors. Don’t worry, I will be adding an attachment of .cpp file created by me. You just have to compile and run. Once it is compiled successfully a new executable (.exe) file will be created if you are using Microsoft Windows. This file enables you to directly run the program without compiling again and again.
Now you can use your own tool for encryption and it’s free! Since you created it! Try decrypting the locked file again, this will give you back the original in unlocked.txt. Keep in mind, the longer your password is, harder it is to crack the encryption (keep it at least more than 20 words).
Here is all the code collectively:
#include <iostream>
#include <fstream>
#include <string>
using namespace std;//encryption function to convert between cipher and original
void xor_encrypt(char *key, char *string, int n)
{
int i;
//length of password
int keyLength = strlen(key);
for( i = 0 ; i < n ; i++ )
{
//XOR Operation
string[i]=string[i]^key[i%keyLength];
}
}
int main(void) {
char key[] = “AllHailTheKingKush1212HAHA1212hehe”; //password, this can be changed according to your wish but keep it large
int choice; bool lock=false;
char LOCKEDFILENAME[] = “locked.txt”;
char UNLOCKEDFILENAME[] = “unlocked.txt”;
streampos size;
union
{
long long int n;
char ch[sizeof(long long int)];
} buffer; //temporary storage for processing encryption
choiceMaker:
cout<<“\nWhat would you like to do?:\n1)Lock\n2)Unlock\n”;
cin>>choice;
//this will create a menu through which user can choose what he wishes to do.
switch(choice){
case 1:lock=true;break;
case 2:break;
default:cout<<“Invalid choice, input only (1/2).\n”;goto choiceMaker;
}
//encrypt unlocked.txt file to locked.txt
if(lock)
{
ifstream unlocked;
ofstream locked;
//creating two file streams, one for input and another for output
unlocked.open (UNLOCKEDFILENAME,ios::binary);
locked.open (LOCKEDFILENAME,ios::binary);
if (unlocked.is_open()) //checking if the file has opened successfully
{
unlocked.seekg (0, ios::end); //jumping to end
size = unlocked.tellg(); //checking the file size
unlocked.seekg (0, ios::beg); //coming back to start
while (unlocked.read(buffer.ch,sizeof(buffer))) //reading small bytes at a time
{cout << buffer.n << ‘\n’; //visual log
xor_encrypt(key,buffer.ch,sizeof(buffer)); //encrypting
locked.write(buffer.ch,sizeof(buffer)); //writing ciphered text to locked.txt
}
cout<<“\nFile size:”<<size<<” Buffer size:”<<sizeof(buffer)<<endl; //buffer size depends on process architecture and compiler. In x64 it was 8bytes
cout << “\nLocked Successfully.”;
}
//resources are cleared.
unlocked.close();
locked.close();
}
//decrypt it.
if(!lock)
{ //everything same as above
ofstream unlocked;
ifstream locked;
unlocked.open (UNLOCKEDFILENAME,ios::binary);
locked.open (LOCKEDFILENAME,ios::binary);
if (locked.is_open())
{
locked.seekg (0, ios::end);
size = locked.tellg();
locked.seekg (0, ios::beg);
while (locked.read(buffer.ch,sizeof(buffer)))
{cout << buffer.n << ‘\n’;
xor_encrypt(key,buffer.ch,sizeof(buffer));
unlocked.write(buffer.ch,sizeof(buffer));
}
cout<<“\nFile size:”<<size<<” Buffer size:”<<sizeof(buffer)<<endl;
cout << “\nUnlocked Successfully.”;
}
unlocked.close();
locked.close();
}
}
You can modify this program to accept a password every time it runs and decrypt with it. It will decrypt even with wrong password but your original content cannot be obtained. Even after successful decryption, it will still look like garbage. That’s because the XOR pass we have used can only revert it back to original. Try adding more functionality and let me know in comments!
Attachment: Download Zipped file for this project.