How to: Hide your data in a Audio Song

Introduction

Due to the way different file types are read it is possible to have a single file that acts differently depending on how it is read. For example sounds & images are read from the header down whereas ZIP files are read from the footer up.

All sound files should work, but some are more unpredictable that others. Mp3s seem to be the most reliable so this tutorial will be using them in the examples (plus who doesn’t love mp3 songs). All the steps are same if you want to use an image(.jpg) instead of sound.

How to create one

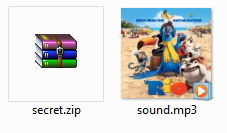
Firstly get hold of a sound file you want to hide the data in (example sound.mp3), then gather all your files you want to hide and put them in a ZIP (example secret.zip).

Our chosen Sound and zip file:

sound-secret-files

Windows 7: Shift+right click in the folder containing the files will open command prompt in that directory Windows: Open command prompt (start->run cmd), then use cd to get to the folder where the files are stored. Linux: You know what to do, open terminal and move to directory containing files.

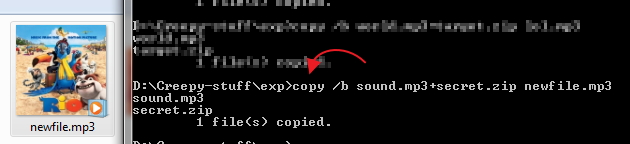
We now need to merge these files together, but we want to use a binary merge to keep the two files intact. With Windows copy command this uses the /B switch. (Binary Data)

Windows

Code:

copy /B sound.mp3+secret.zip newfile.mp3

Linux

Code:

cat sound.mp3 secret.zip > newfile.mp3

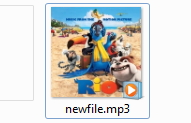
You should now have gained a new file called newfile.mp3. This should look identical to the sound you started with when opened with a media player, but with a secret payload hidden within. Here is the example sound containing a ZIP:

sound-secret-files-command

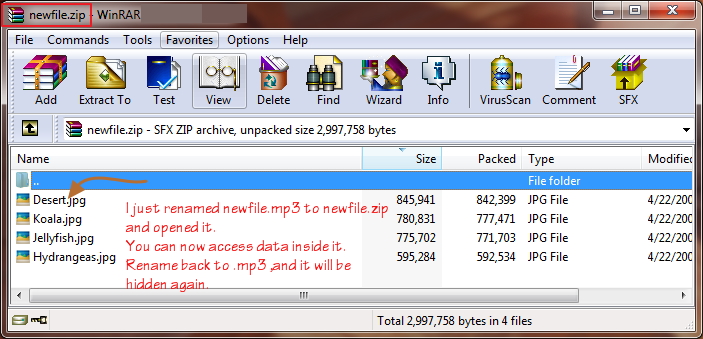
The two simplest ways to get your data back out of these files is to either change the extension from .mp3 to .zip or to open your chosen ZIP program and open newfile.mp3 within that. You should now be presented with your original files.

sound-secret-files-access-data

One more way of getting your .zip file back is to run this code:

copy /b newfile.mp3 file.zip

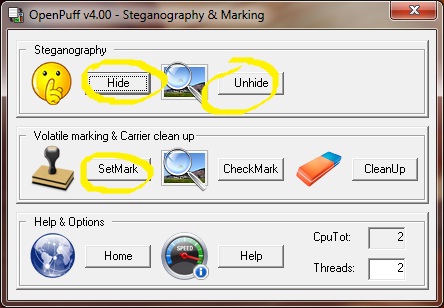
This is clearly not a secure way to store your data but as a quick and dirt solution to hide files it works well enough. If you are storing text documents in the ZIP then the contents of them will still be visible in a HEX editor looking at newfile.mp3. There are much better steganography tools that use encryption keys to securely store your data within other files.

This method only appends new data (from secret.zip, in this article) into after the footer identifier of mask file (sound.mp3). Good media player will only read from header to footer, and will not read further than that. So whatever data we add will not be read, and the original file will remain in good condition. only it’s size is changing because we add more data into it. The same applies to every file which has header and footer identifier (e.g. jpeg, png, gif, mp3, mp4, exe, and most of known file format).

How to : Use Google Drive to Sync User Data in more than one PC

Google Drive is a great service no doubt, but simply installing the application, and synchronizing your files is just the first step. (The option for downloading and installing is available on the homepage of your online Google Drive at the bottom of the sidebar)

You can move your user data folders (Documents, Pictures, Music, Videos and Downloads) by right-clicking the folder and changing the destination path under ‘Location’ tab in the Properties menu.

  • Windows 7 users need to go to the Explorer panel to the left, Expend the collapsible Library folder, and right-click the “My Documents” or similar folder to get the properties menu.
  • Click on “Include a Folder”, Browse to Google Drive Sync Folder. Select “Set Save location”.

document-properties

  • Change the location of one of these folders to your Google drive folder to synchronize it between computers. Do this on each computer you use and you’ll have the same files in your Documents, Downloads, and all other folders on all your computers.

Note: If the amount of data you have exceeds the storage capacity of Google Drive (that is, if the data if more than 5 GB), then the above method will fail to completely transfer all the files. Once the storage limit of Google Drive is reached, you will unable to add any more folders/files to it, and in this case, to your user data folders as well.

Steganography – Hide your data in images

If there’s one thing that history and popular culture has taught us about spies and secrets, it’s that often, the best hiding spot is the one in plain sight. After all, if an intruder is searching for valuable information, surely the last place he would check is right under his own nose, right?

A Little Get to Know

Steganography

This logic forms the basis for steganography, itself an ancient historical practice of concealing information within images. This practice differs greatly in purpose from cryptography. The latter employs code to hide a message, this appears as jumbled letters and numbers, unless a cipher(or key) was used to decrypt the information back into its readable state. However, while cryptography is a great for sending messages securely across unsafe channels, the very nature of the encrypted message will tip-off anyone is its true form. In short, just because its hard to break into, doesn’t mean you want to leave it in plain sight. What if sending encrypting messages itself is against the law?

This is where steganography comes in. Using basic freeware tools like OpenPuff, It is possible to hide audio files, videos, messages and images within a file (usually an image).

Now comes the Action : Hide

You can download OpenPuff from here. After downloading and installing OpenPuff you’ll see two primary options for steganography: Hide and Unhide.

openpuff-title

Select Hide, and you will be taken to a menu divided into four steps.

  • The first step entails entering up to three different passwords to secure your data. You can choose to enter only one password as well, if keeping up with them all becomes tough.
  • Then you will have to select your target file that you’ll be transferring.Use the Browse button, and select the target to see its overall size in a bar below the name.
  • In this third step, you will have to choose a carrier. Keep in mind that the carrier can’t be smaller that the target (it may become suspicious).

openpuff-hide

You can attach multiple carrier bits if one file isn’t big enough. Hit the Add Button to navigate to files designated as the carrier space is greater, the red status bar will turn green.

The Bit Selection Option allows you to properly encode the carrier’s size until it matches with the target. Keep in mind that some formats would be better suited than others. OpenPuff will alert you if the file type isn’t supported for being a carrier.

After Bit Selection, hit “Hide Data” and a new file will be created. On the outside, the carrier will look like a normal image file.

Unhide

Navigate to the Unhide option in the main menu and proceed to enter all the relevant details used for encrypting the file. Ensure that the passwords and bit Selection option are exactly the same as those used before, or else the file won’t open. Select your carrier file then, hit “Unhide” and Bam!! The target is now revealed.

openpuff-unhide

Decoy

You can also choose to fool any attackers by using the “Add Decoy” option. Simply head over the Hide menu, and after the previous four steps, select “Add Decoy”. You can add a file, just like when adding the target, and set multiple passwords for it. When you’re done, hit “Hide Data”.

Watermarks

Selecting the SetMark option, and adding a mark to a specified carrier can add watermarks. Similarly, CheckMark allows you to verify the watermark by selecting the carrier in question. You can also use CleanUp to remove a watermark from an image.

openpuff-setmark

In the End

Steganography has its disadvantages and controversies but when used effectively, it becomes an invaluable tool for covert transmissions. Not to mention those times when you just want to claim right to your work.