How to: Create folder that no one can access not even you

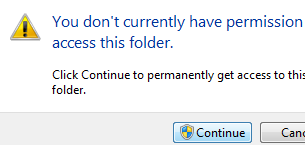
These type of folders generally known as Private folders. To make Private folder which nobody can open, delete, see properties, rename we need to modify its permission for system. This can either done by going to its Properties > Security Tab or through Command Prompt, we will going to discuss later one.

  • First create a simple folder that you normally create.
  • For example- “softnuke”, in D drive so the Directory will look like “D:\softnuke”.
  • Open command prompt (Win+R ,type cmd) and then input the following command on the screen.
CD D:

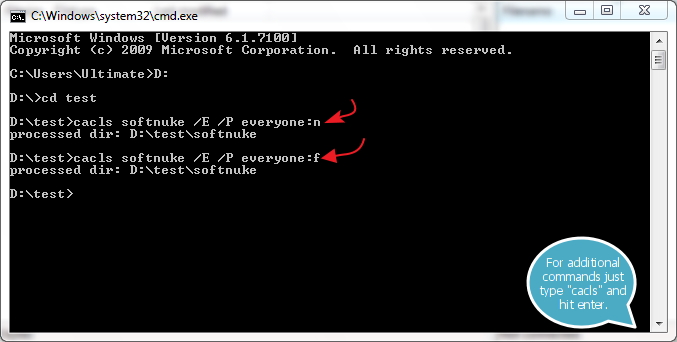
This line is to change our directory to D drive where our folder “softnuke” resides.

Cacls softnuke /E /P everyone:n

This line sets permission of everyone to deny from any access. “n” after everyone is used to set none.

Now the folder is inaccessible from any user even from administrator. To access that folder again try the following command.

Cacls softnuke /E /P everyone:f

And the folder is accessible again. We have used “f” to set Full permissions to everyone.

cacls-command-cmd

You can use this method to store valuable assets and documents which you don’t want to be deleted or want no one to temper with.

You can fasten this by creating 2 “.bat” files. One file will be used for setting permissions to none and second for full permissions. Here is an example just edit it with notepad to adjust by your needs. You need to modify the name of folder and copy both of the files in same folder where your target folder is stored.  :

Bat File 1 : Download

Bat File 2 : Download

bat-files-structure


Note: Your browser may show you that this file is malicious but trust me thats only because “.bat” file is powerful enough to execute any cmd command thats why its warning you not to download these type of files from untrusted sources. But Softnuke will never going to harm its readers and you can download that file without worrying much.

How to Restrict Hard Drives in Windows 7 for User Accounts

You can restrict access to a hard drive in Windows 7 for other user accounts in the same computer. This is useful if you have files on a hard drive that you do not want anyone else to access. Only specified user or Administrator will be able to access these. You can also change other settings, such as only allowing a user to view a file and not change it.

Steps to Follow :

  • Log on to your computer with an account with Administrator rights. Click “Start,” type “user” (without quotes) in the automatically selected “Search programs and files” search box and click “User Accounts.” Click “Manage another account.”


  • Click “Create a new account,” if you need to create a user account for other people that will be using the computer. If you already have another account set up, go to the next step. You need to have at least your user account and another one set up to restrict access to a drive. Type a name for the user and click “Create Account.”

  • Click “Start” and “Computer.” Right-click the name of the hard drive you want to restrict access to. Click “Properties.”

  • Click the “Security tab” in the “Properties” window that opened. Click “Edit…” and “Add…” in the “Select Users or Groups” window that opened.
Restrict-Hard-Drives-in-Windows-7-1
  • Type the name of the other user account on your computer or you can click “Advanced” and then “Find Now”, then select your user account. Click “OK.” Uncheck the boxes to the left of any options that you do not want the user to have available. Check the “Deny” box for “Full control” to disable all control from the user for files on the hard drive.
Restrict-Hard-Drives-in-Windows-7
  • Click “OK,” “Yes” and “OK.” Close any open windows. Click “Start,” log off of your account and log on as the other user to test your settings.

  • Click “Start,” “Computer” and double-click the name of the hard drive you restricted access to. A window indicating that “Access is denied” is shown. Close the window and log off the computer.

And you are done.