MX Player

One of the great things about Android, is that it has a flexibility – especially with regard to the file system – that you don’t get on iOS. It is, for example, perfectly possible to drag and drop video and music files over USB on to the SD card or internal storage of your phone. The problem comes when playing those files back. For music, the Android player is fine; for video you might want something more.

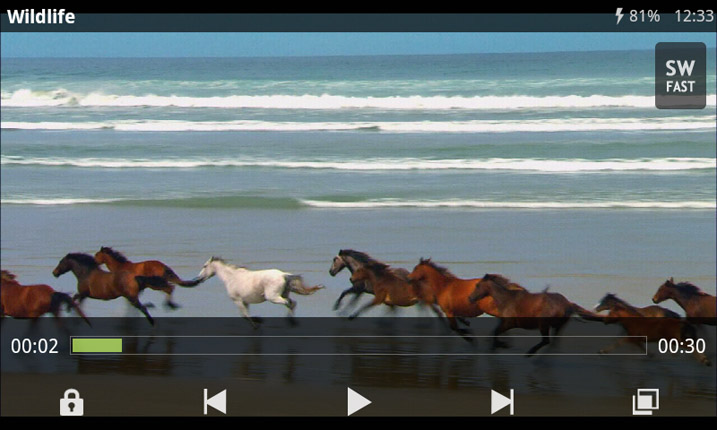
The video player that comes built in with your Google Android device is pretty limited to say the least. If you want to get the most out of your Android device then we strongly recommend downloading a new video player. With the MX Video Player you can unlock a whole host of new codecs/video files for your Android and it won’t cost you a penny.

Before we get any further, you should know that nothing in life is truly free and, alas, the MX Video Player is no different, it comes with banner adverts. They won’t interfere with your video playback, but whenever you’re lining up a video or fiddling with the volume or zoom, then you will see the little banner ads. But it’s a ‘free’ and much better video player at the end of the day, so it’s a pretty fair compromise.

Possibly the best thing about the MX Video Player is that if app doesn’t recognise the the codec of the video you are trying to play, it will give you a link directly to where you can download the correct codec. For there it’s a painfully simple two clicks and MX Video Player has downloaded and saved a new codec for you Android device. Whenever we flummoxed it with a codec that wasn’t installed, we were able to download and instal the new codecs via the app in roughly 30-seconds. A very impressive feature!

Bottom Line

It seems the whole idea behind the MX Video Player is that it puts you in control. Presets become a thing of the past, and if you ask me, that’s a good thing. That you could throw almost any video file at it without having to bother with codecs and trans-coding on the PC, is the clincher.

Use VLC to stream video and audio

VLC includes a fairly easy-to-use streaming feature that can stream music and videos over a local network or the Internet. You can tune into the stream using VLC or other media players.

Use VLC’s web interface as a remote control to control the stream from elsewhere. Bear in mind that you may not have the bandwidth to stream high-definition videos over the Internet, though.

Broadcasting a Stream

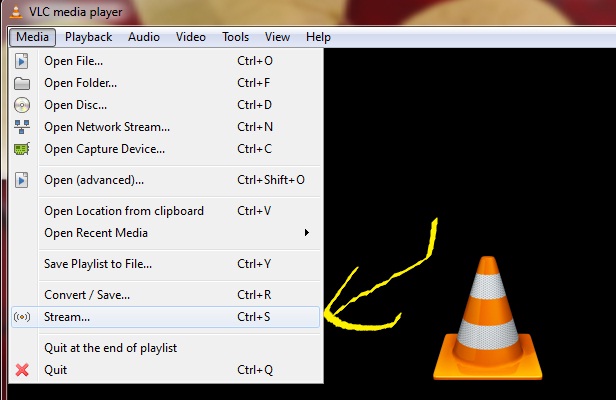
To start broadcasting a network stream, click the Media menu in VLC and select Stream.

In the Open Media dialog, select the media you want to stream. You can select one or more files on the Files tab, select a CD or DVD on the Disc tab, or even capture video from a specific device on the Capture Device tab. For example, you could stream your desktop by selecting Desktop on the Capture Device tab.

Click the Stream button after selecting your media.

The Stream Output window will appear. The first pane just lists the media source you selected – click Next to continue.

vlc-stream

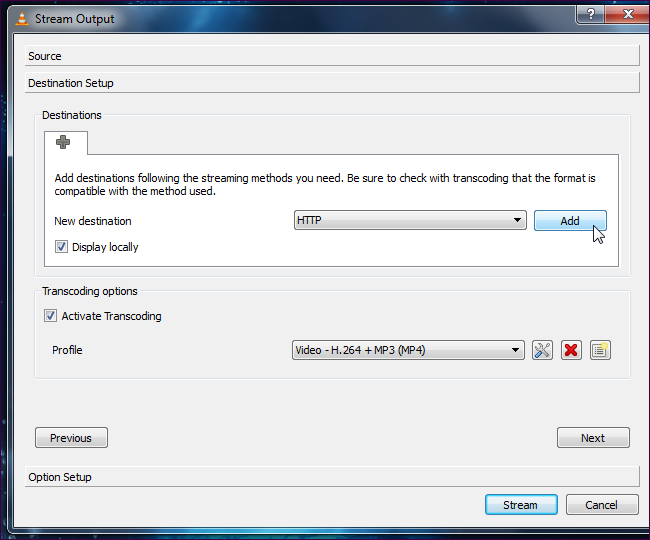
On the Destination Setup pane, you’ll need to choose a destination for your stream. For example, you can select HTTP to listen for connections – other computers can connect to your computer and watch the stream. You can also select UDP to broadcast to a specific IP address or range of IP addresses.

After selecting your destination, click the Add button. You may also want to activate the Display locally check box – if you do, you’ll see and hear the media being streamed on your local computer, so you’ll know it’s playing correctly.

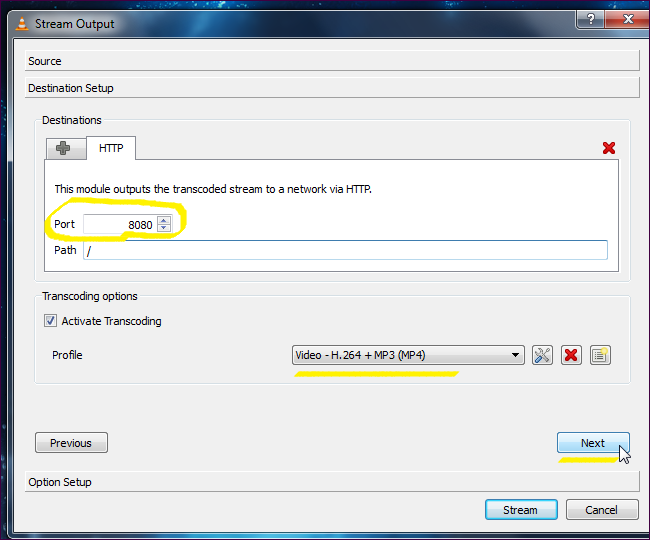
After adding a destination, you’ll be able to customize its settings. With the HTTP destination, you could specify a custom path – but the default one will work fine.

vlc-stream-http

You can also tweak the transcoding settings – by transcoding to a lower quality, VLC can save network bandwidth.

Click Next to continue to the Option Setup pane – you probably don’t need to tweak any of the advanced options here. To start streaming, click the Stream button.

vlc


If you selected the Display locally option, the media will start playing locally on your computer.

If you have a firewall enabled, ensure that VLC is an allowed program or no computers will be able to connect. If you’re trying to stream over the Internet, you may also need to forward ports on your router.

 Connecting to a Stream

To tune in to a stream, click the Media menu in VLC on another computer and select Open Network Stream.

Assuming you used HTTP, enter an address like http://IP.Address:8080.

(If you specified a custom path for your HTTP stream in the Path box, you’ll need to specify the custom path here. For example, if you specified /path as your custom path, you’d enter http://IP.Address:8080/path in the box here.)

After clicking Play, the stream should start playing. To control playback remotely, try setting up VLC’s web interface. If you encounter an error, make sure VLC isn’t being blocked by a firewall on the streaming system.